Introduction
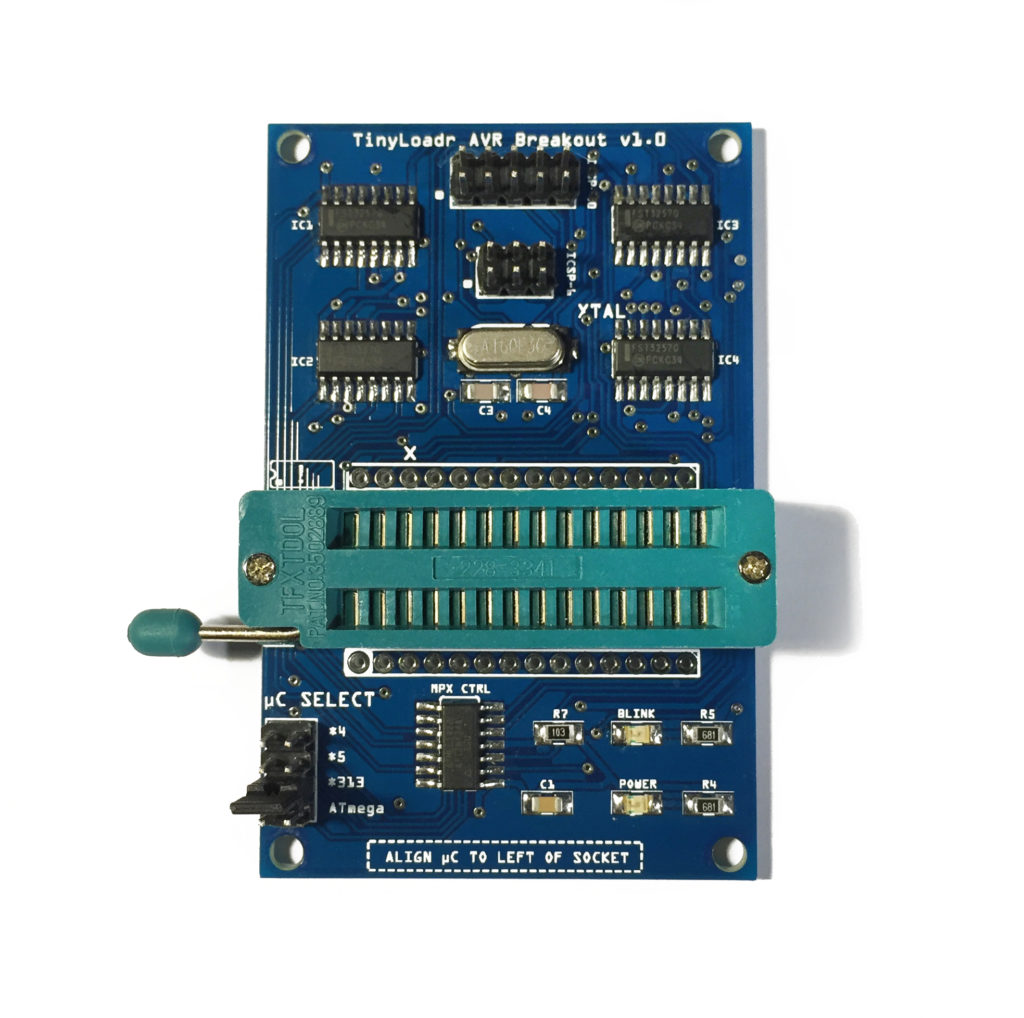
This tutorial will show you how to use the TinyLoadr AVR Breakout to upload code to a DIP microcontroller in the built-in ZIF socket.
Setting everything up
The TinyLoadr AVR Breakout requires a standard AVR programmer in order to work. This means a programmer with SCK, MOSI, MISO, RESET, 5V, and GND connections. Some examples of standard AVR programmers include simple USBasp devices, or an Atmel AVRISP mkII.
The ZIF socket is for ATtiny and ATmega microcontrollers in a DIP package, and the ICSP headers are for attaching your AVR programmer.
1. Put the programmer in the right mode.
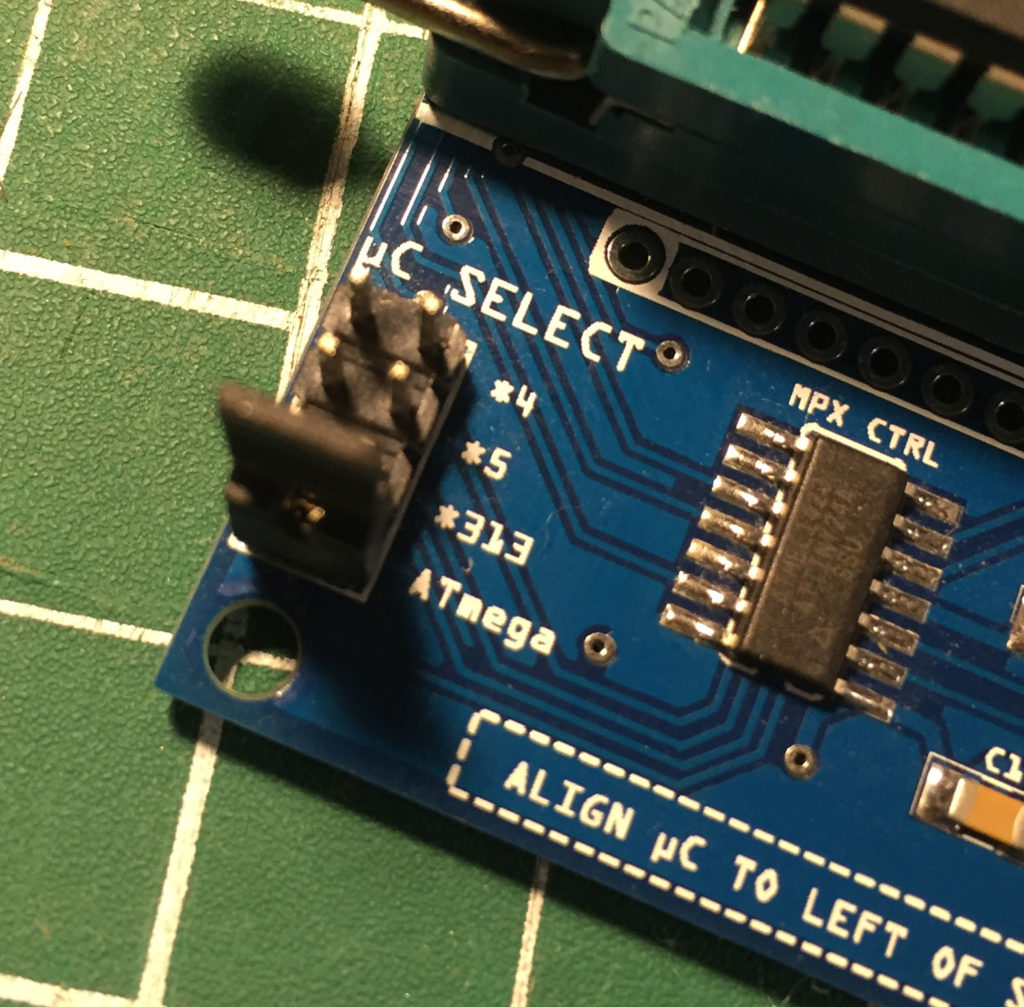
Locate the µC Select jumper and set it to the appropriate setting for the microcontroller you wish to program.
WARNING: Failure to set the jumper properly may result in damage to your microcontroller or the breakout board. Please ensure that you have set it properly before inserting your microcontroller.
For an ATtiny24/44/84, or other pin-compatible 14-pin AVRs, select *4.
For an ATtiny12/13/15/25/45/85, or other pin-compatible 8-pin AVRs, select *5.
For an ATtiny2313/4313, or other pin-compatible 20-pin AVRs, select *2313.
For an ATmega8/48/88/168/328 or other pin-compatible 28-pin AVRs, select ATmega.
2. Put your microcontroller in.
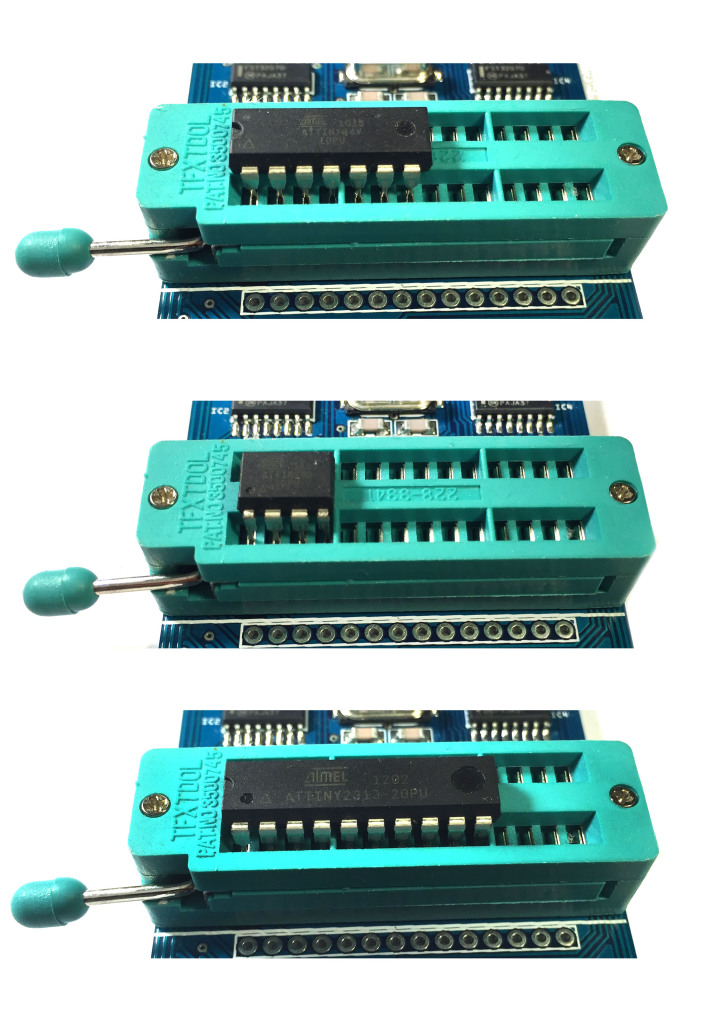
Insert your microcontroller into the ZIF socket, with pin 1 in the left-most contacts. Make sure that the dot or half-circle is facing the LEFT. See the photos below for clarification. Make sure that you insert your microcontroller properly, or you may damage the microcontroller and / or the programmer.
3. Attach your AVR programmer
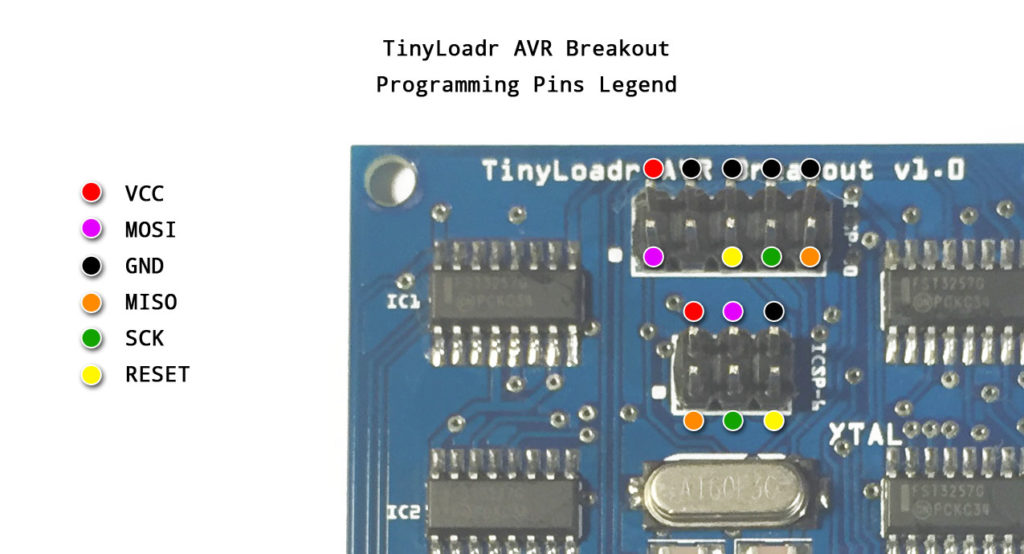
The TinyLoadr AVR Breakout has two connectors that you can use to connect your AVR programmer; the standard 6 and a 10-pin AVR programmer connectors.
The pinout for each connector can be found on the underside of the board (click for full size):
Or you can refer to this diagram (click for full size):
Note that the dot next to each connector marks pin 1.
Once connected you are free to use your programmer to upload code to your microcontroller!
USBasp Windows Drivers
If you have purchased a USBasp AVR programmer with your TinyLoadr AVR Breakout then you will need to install drivers if you wish to use it with Windows. OS X and Linux users do not need to install any drivers.
I recommend using the Zadig USB driver installer. Give that a download, then follow these instructions:
Troubleshooting
All TinyLoadr AVR Breakouts are assembled, programmed with firmware, and tested before they are shipped. The vast majority of issues that users see are related to improper configuration, setup, or use of the programmer, as opposed to a manufacturing defect with the breakout.
If you are getting programming errors then consult the documentation / support for your programmer. Note that 5V programmers are recommended as there is a slight voltage drop for all because of the multiplexers. The breakout hasn’t been tested extensively with 3.3V programmers.
When troubleshooting, be sure to also remove your microcontroller from the breakout and try attaching it directly to your programmer (via a breadboard and jumper wires), and also via the ribbon cable (with jumper wires). This will help determine if the programmer is at fault, if the ribbon cable is at fault, or if the breakout is at fault.
If you have any issues please read through these instructions again carefully and ensure you have followed them properly. If you are still having issues afterwards then please contact me by sending me an email. Please try to be as descriptive as possible and list any errors that you see.


